Enhancing The Trix LINT 27 (22271)
The Trix LINT 27 (product number 22271) is a cheap entry level model. That means sparse detailing, no sound and headlights only. That should not stop you from getting it though. Even though the model is sparsely detailed, the prototype does not have that many details either, which makes it excellent for entry level models.
By comparing my model to the much more expensive LINT 41, it looks as if Trix used the exact same exterior parts. Giving the model a pro look for a fraction of the price.
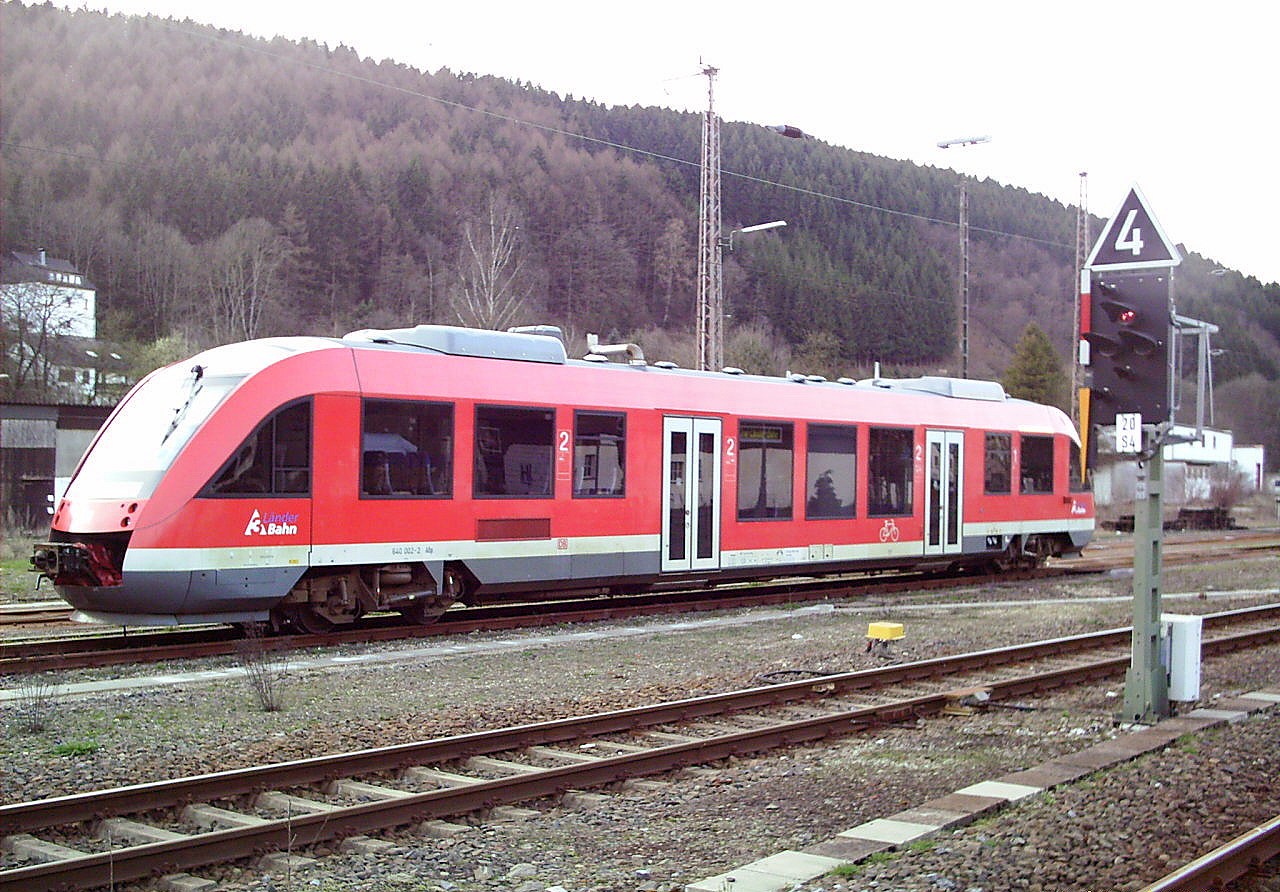
640 002 - Photo from Wikipedia.
The model has no interior and compensates by having tinted windows. The prototype also have tinted windows to a degree that makes the windows look almost black in daylight. Cool that the cheap choice of tinted windows on the model actually makes the cheaper model look more realistic. I like it when things turn out that way.
In case you wondered, it would be extremely difficult to fit the model with a self made interior, as the motor and motherboard takes up the entire room behind the windows. The model was never designed to have an interior. I don't mind as it still looks realistic with the tinted windows. The model is perfect for this cost saving trick.
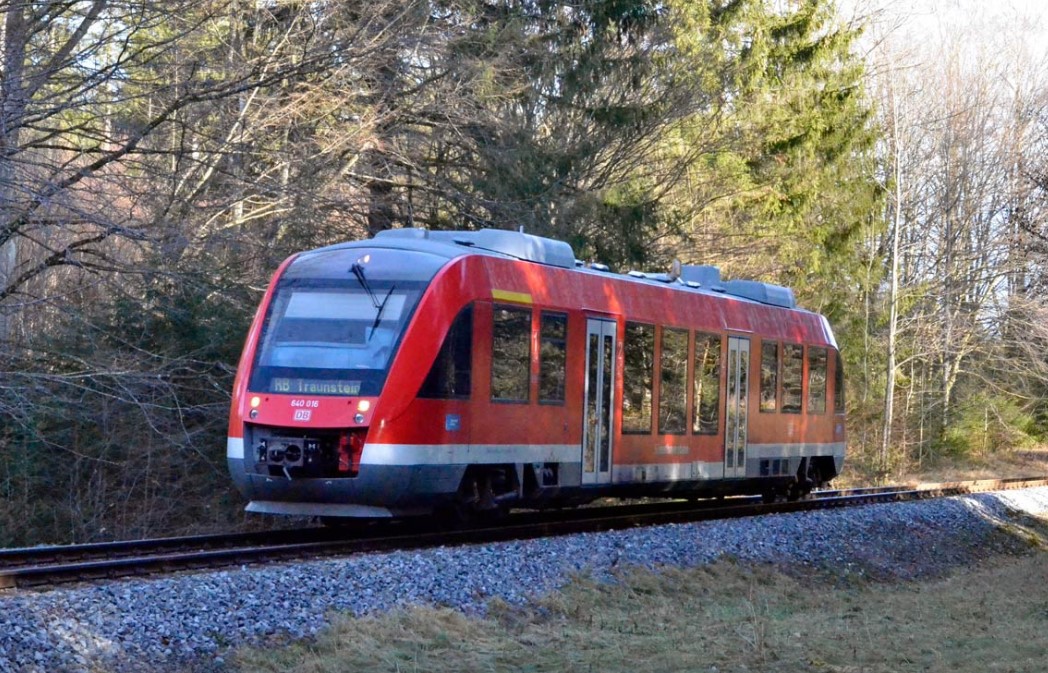
640 016 - Photo: Südostbayernbahn / DB
Upgrading The Model
Märklin produces a more advanced version of the LINT 27 (product number 36640) which has sound and more lighting details like red taillights and a lighted destination sign. Other than that the models are exactly the same. So I decided to upgrade the light in my Trix model by ordering some parts from the Märklin model.
The process is easy and the end result is definitely worth it. The Trix model comes without a decoder and you can use any 21-pin decoder you like. I prefer either the ESU LokPilot or the Märklin mLD3 decoder. When it comes to 21-pin decoders I usually go for the Märklin mLD3 decoder. I know that decoder inside and out, so that is my preferred choice.
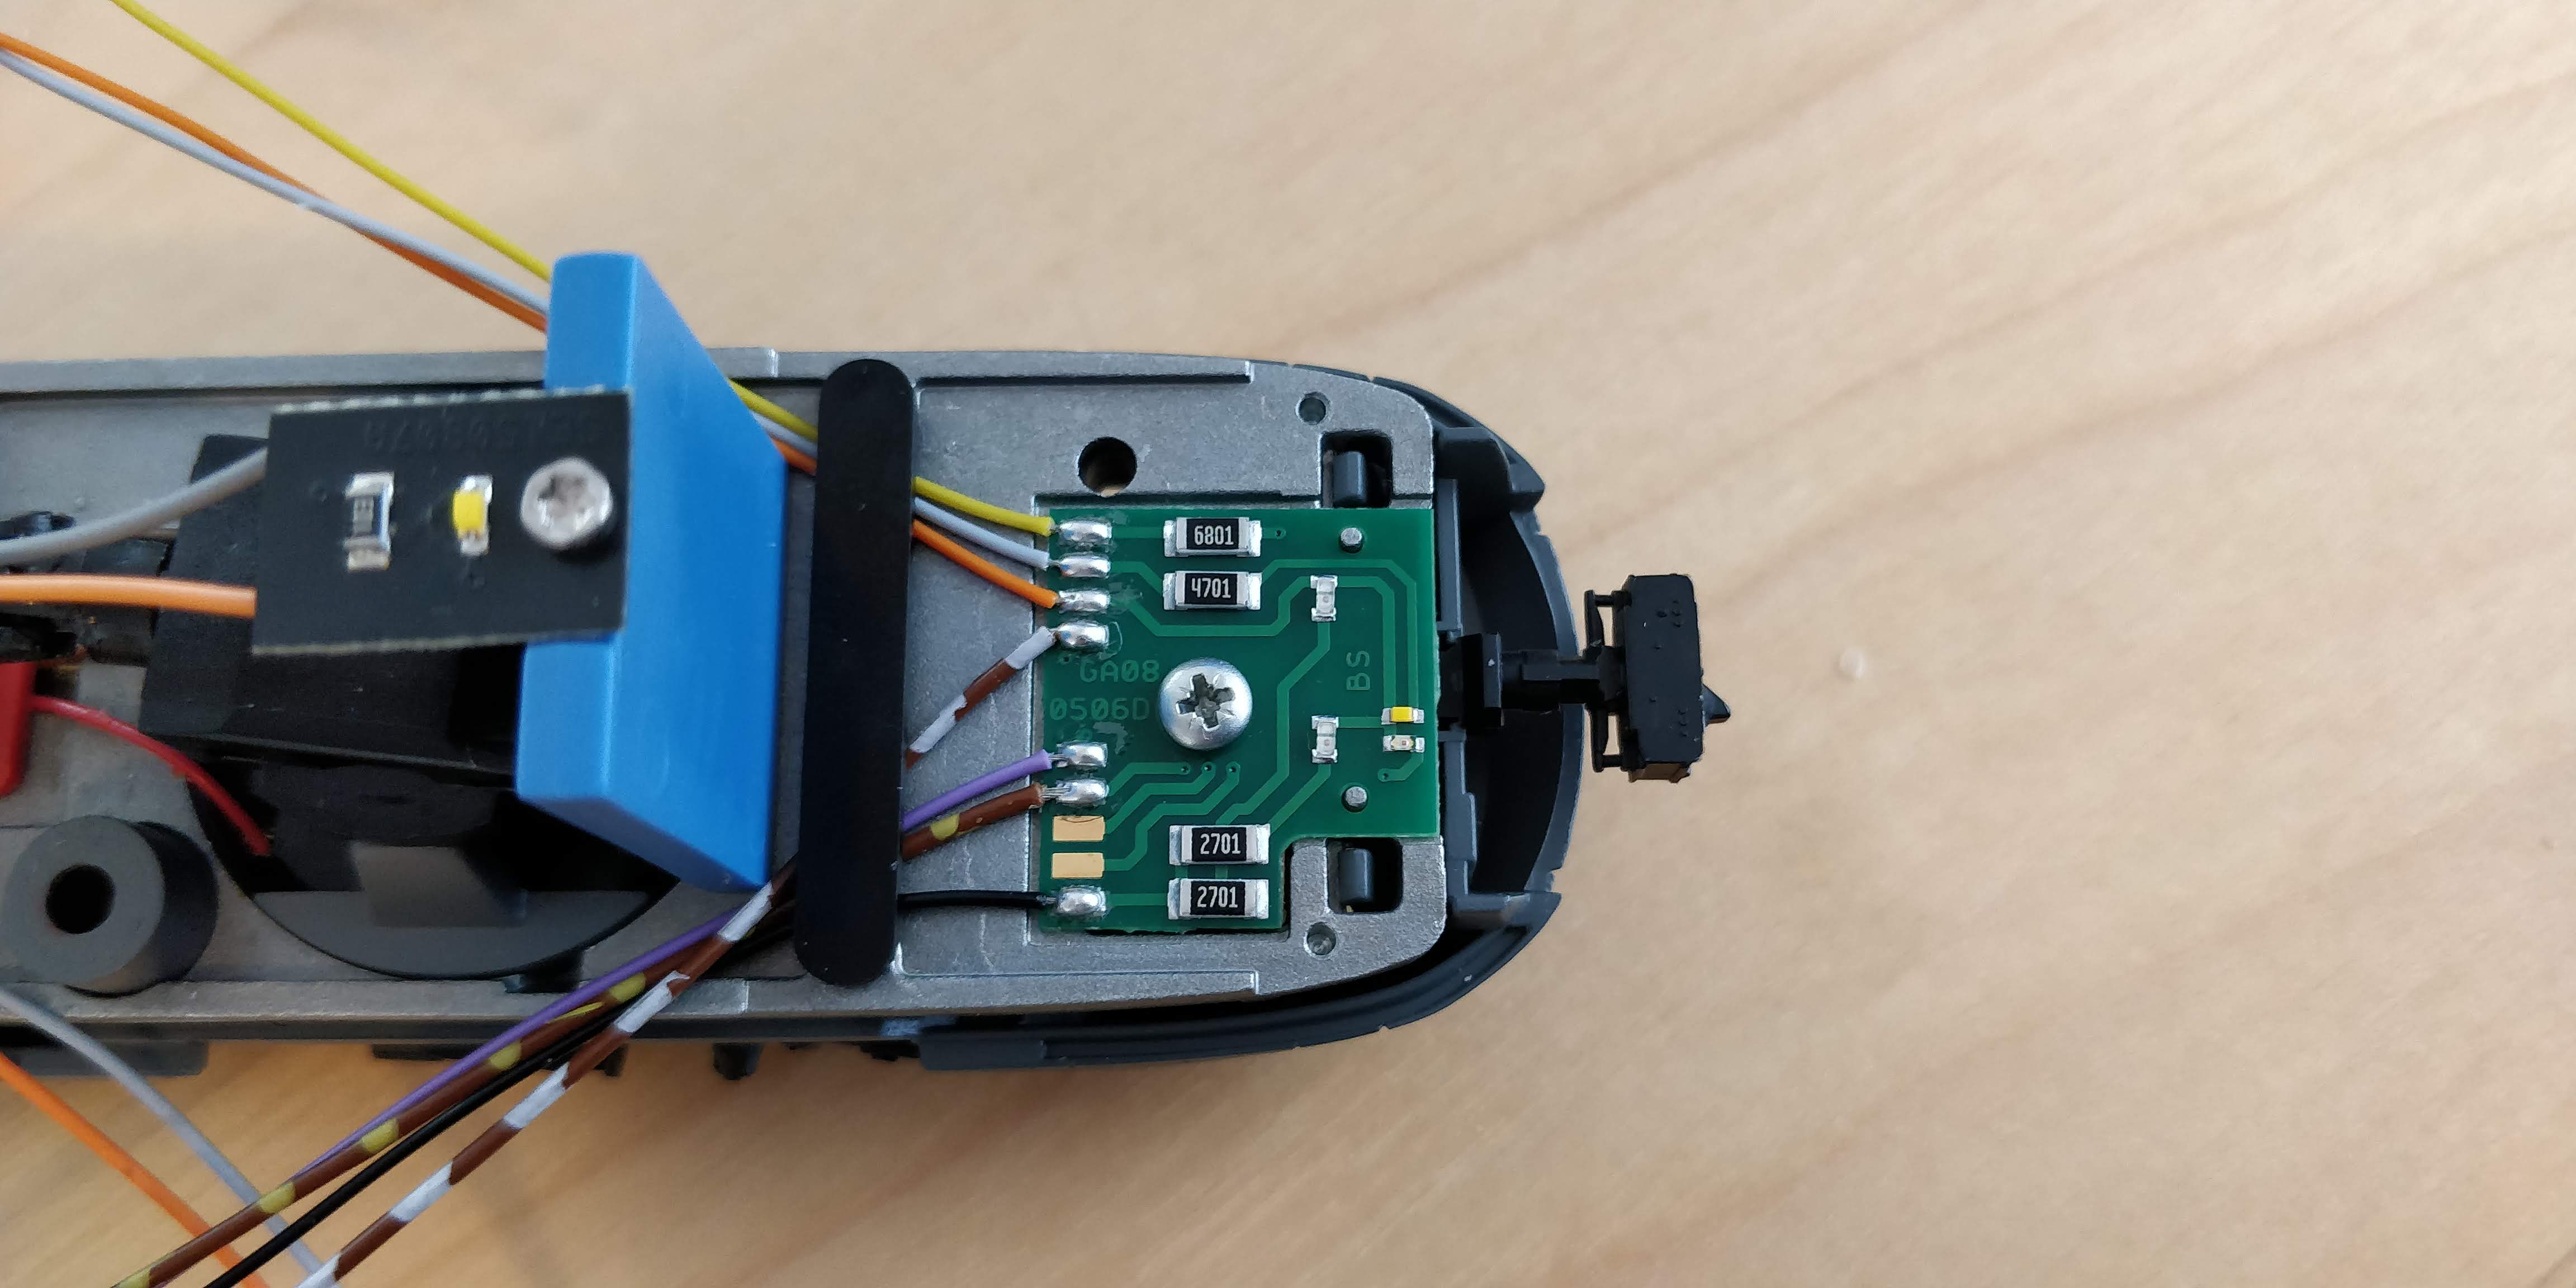
On the picture below you can see the inside of the model. The motor sits in the middle and one cardan shaft drives the only powered bogie. Weirdly enough the motor is attached to the body only by using tape. Yeah, tape as in normal flexible sticky tape. It works, but it strikes me as an odd solution. Even on the cheapest of cheap models I have never seen this before.
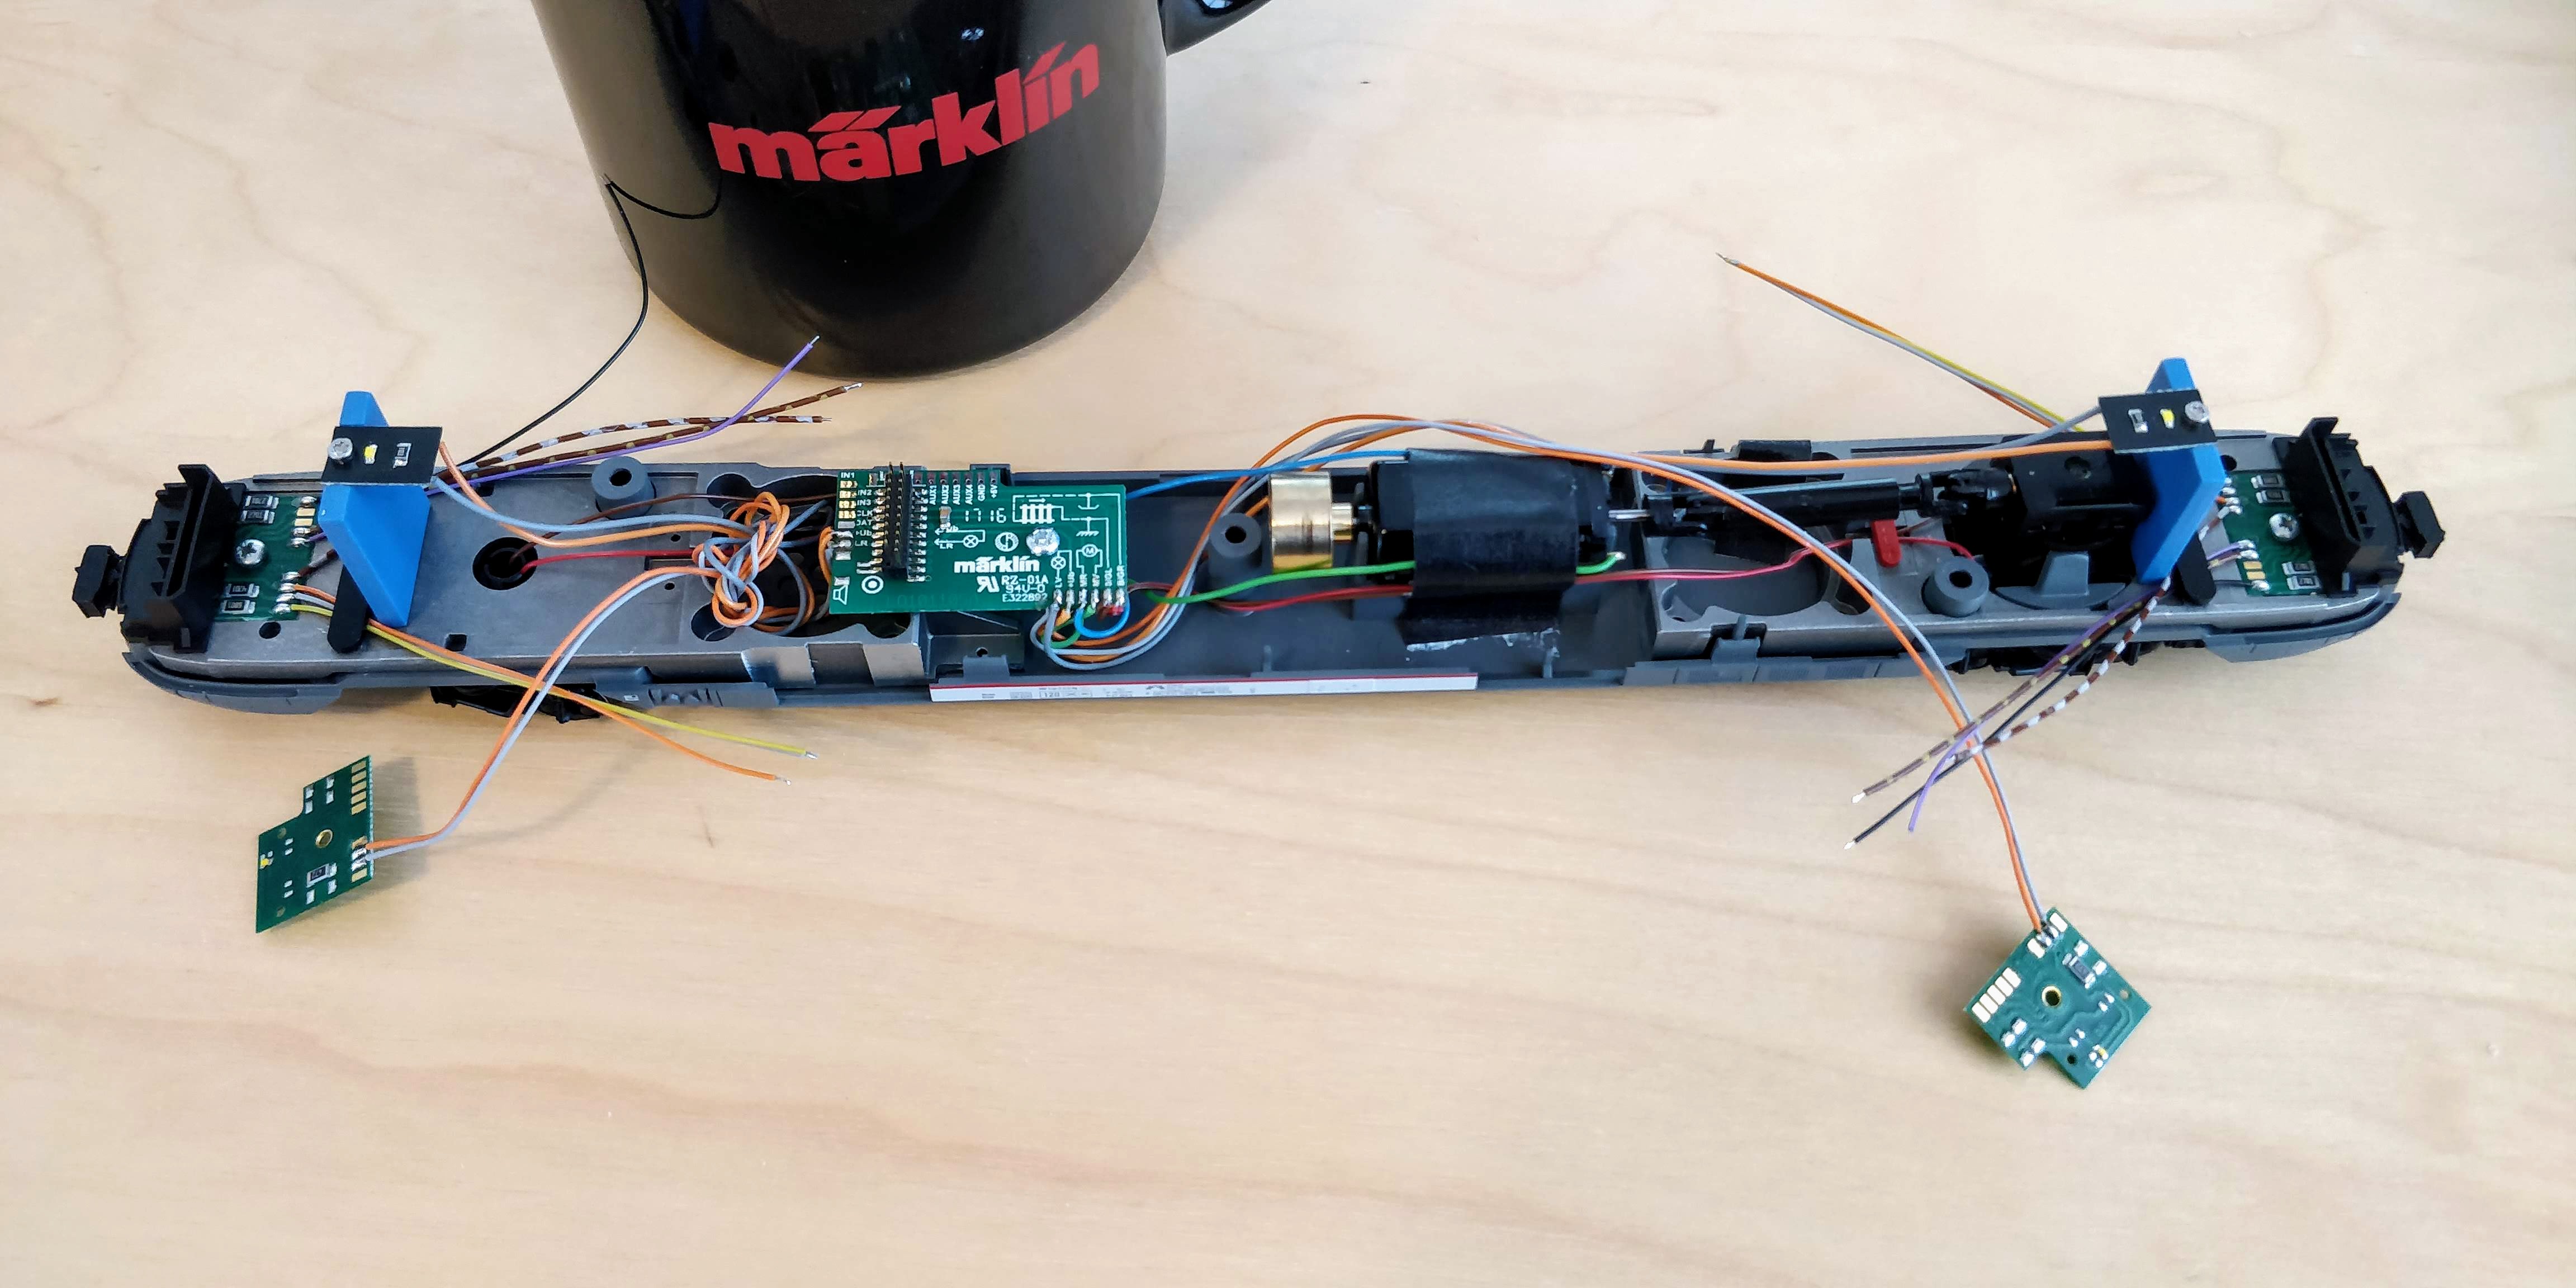
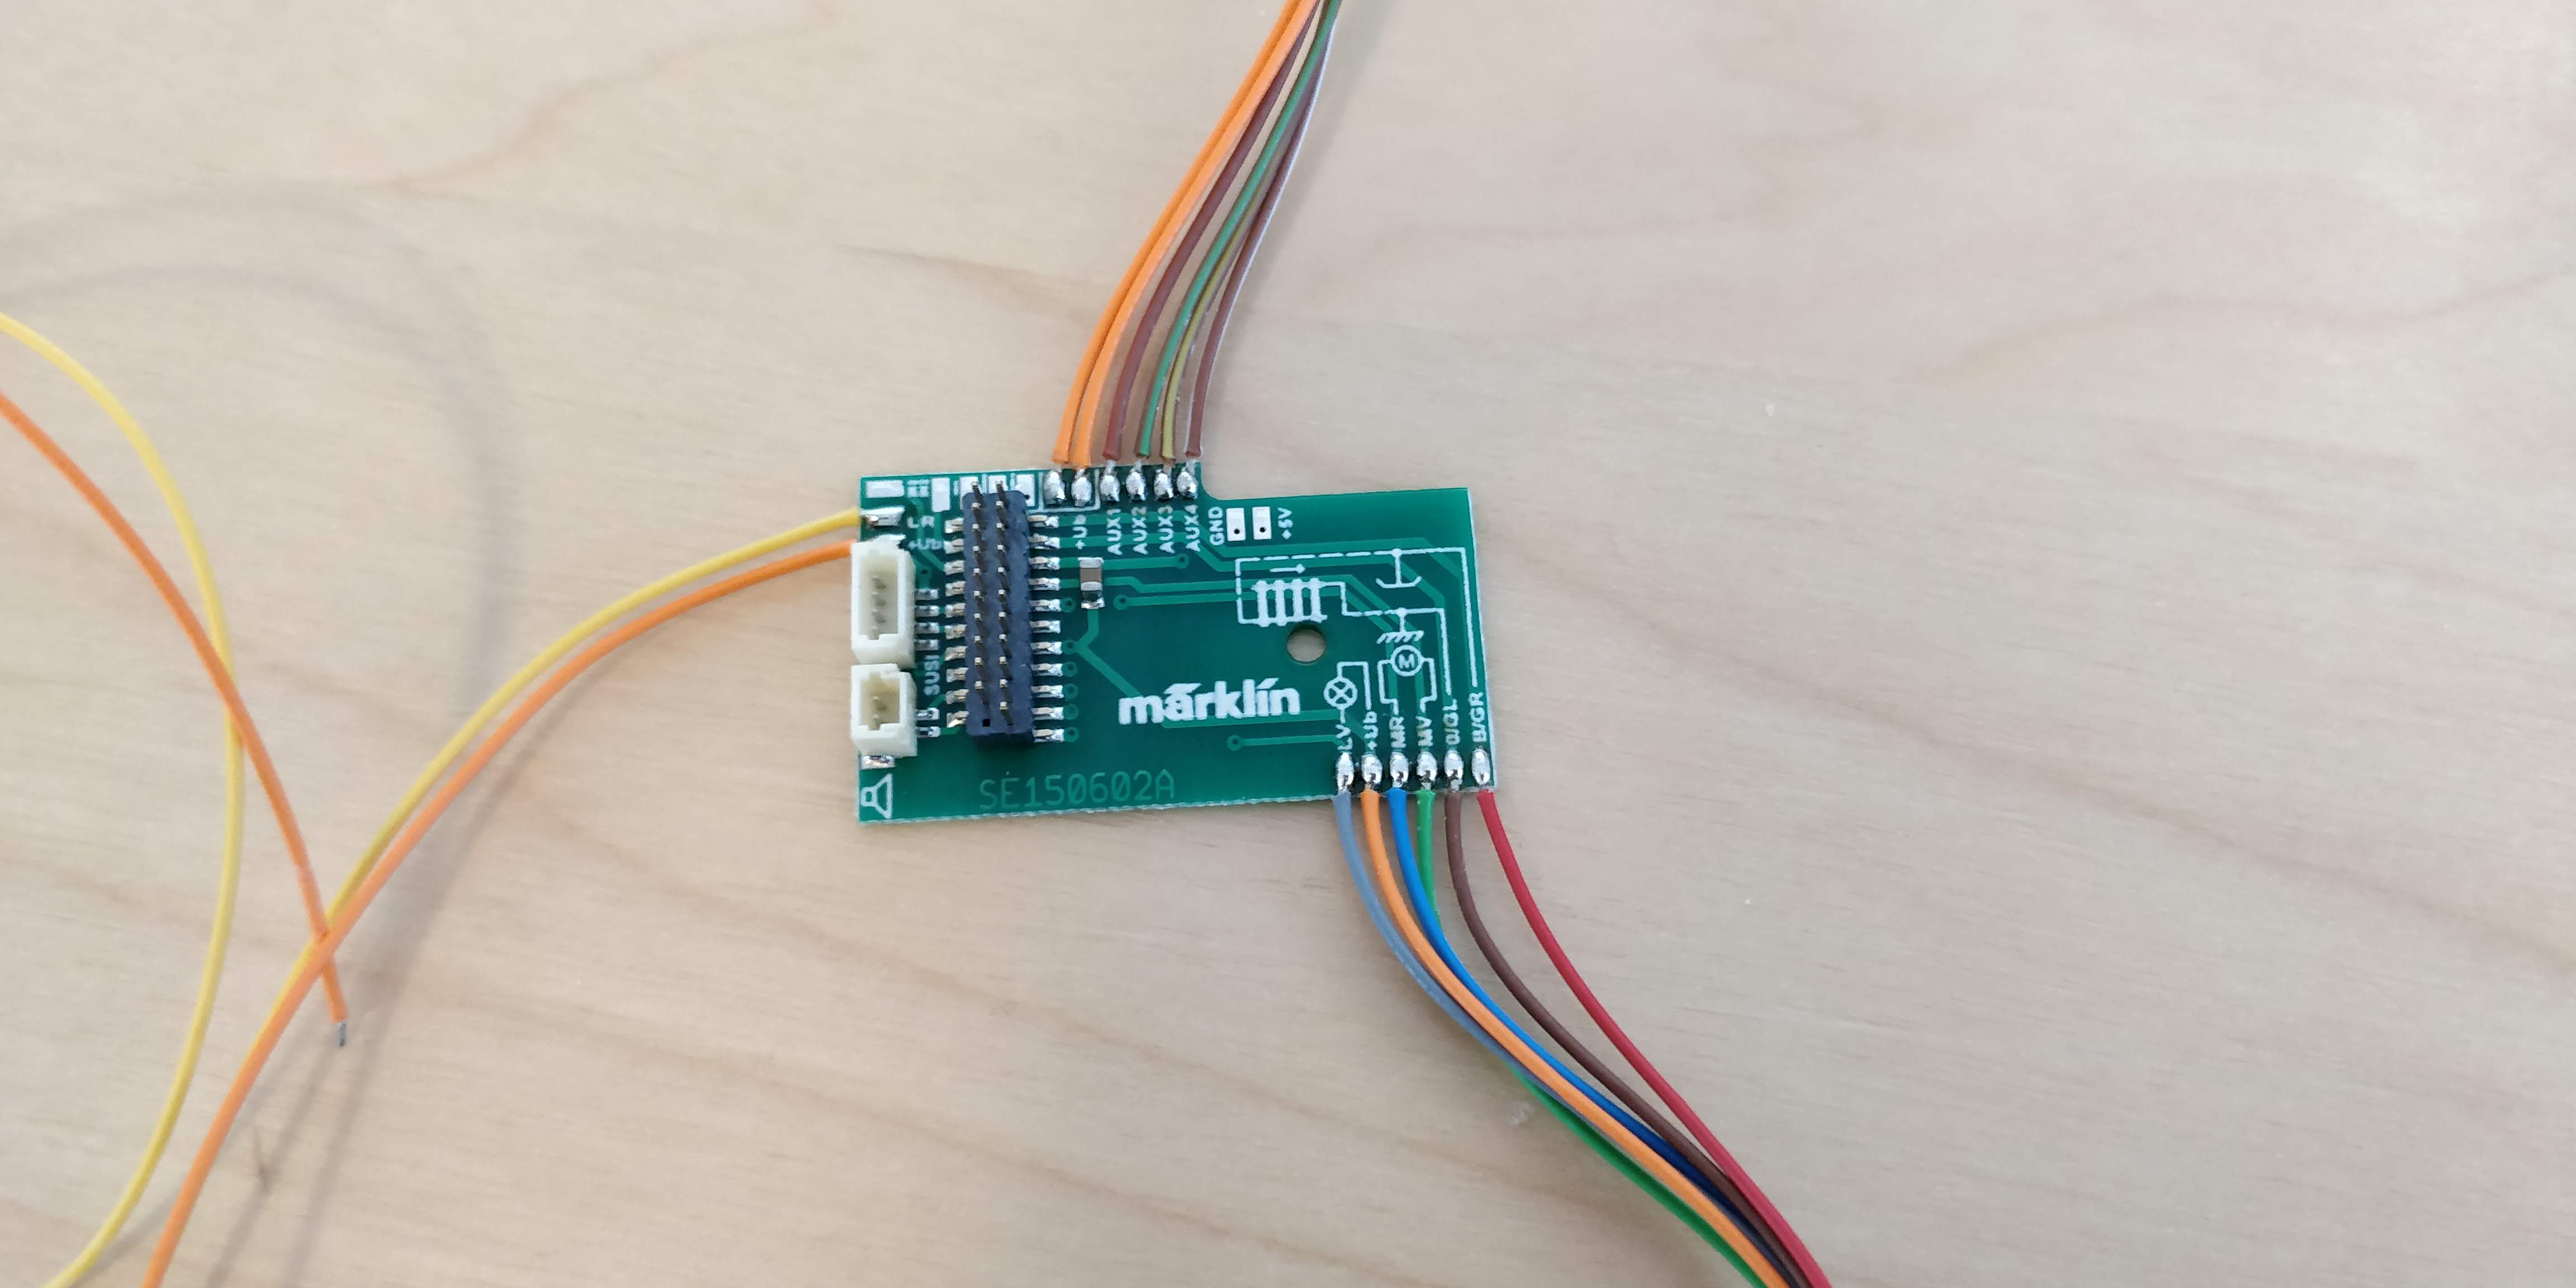
I bought the Märklin decoder kit 60970 which contains the decoder, replacement motherboard and other accessories. As it turns out, the LINT 27 actually uses a motherboard similar to the one in the kit. This made the upgrade even easier as I could simply replace the board in the model with the one from the kit, and simply attach the wires accordingly. The "pro" model uses another PCB.
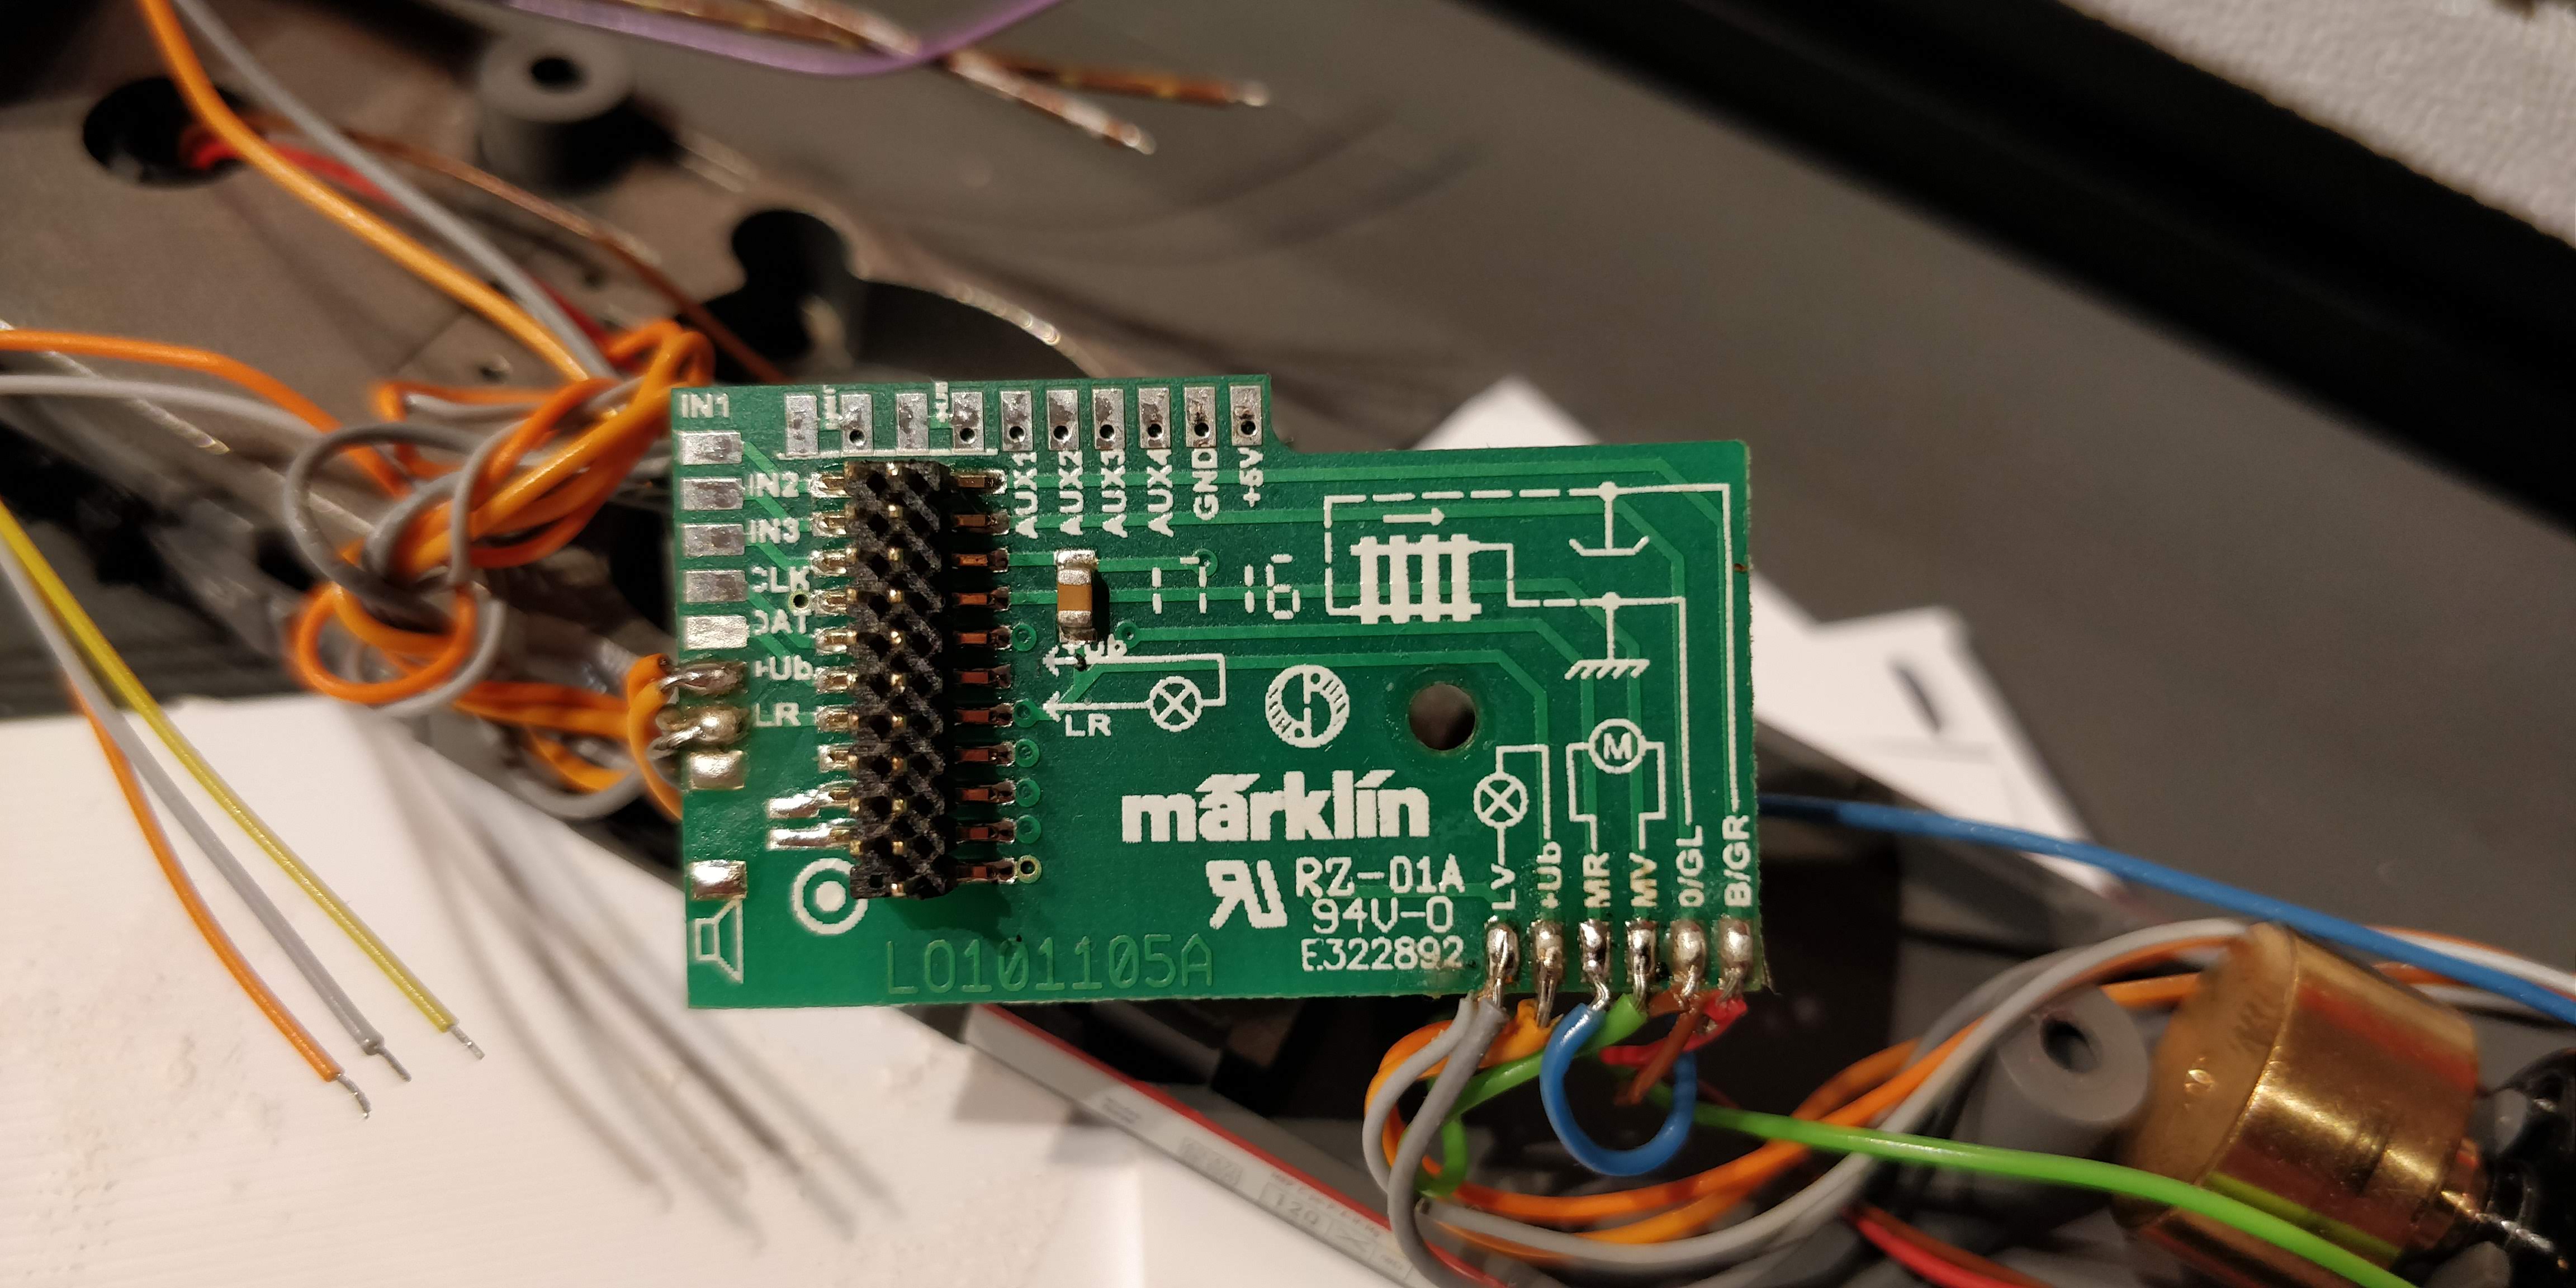
The spare part for the lighting is a new PCB that replaces the one already in the model. This PCB contains LEDs for the headlight, the red taillight and the destination sign. Note the black wire at the bottom, this is actually the wire for the destination sign. This means that you can add a new feature that allows you to turn off the destination sign separately.
This is an awesome bonus feature, and a feature the "pro" model does not have. On the "pro" model they simply coupled the headlights and the destination sign.
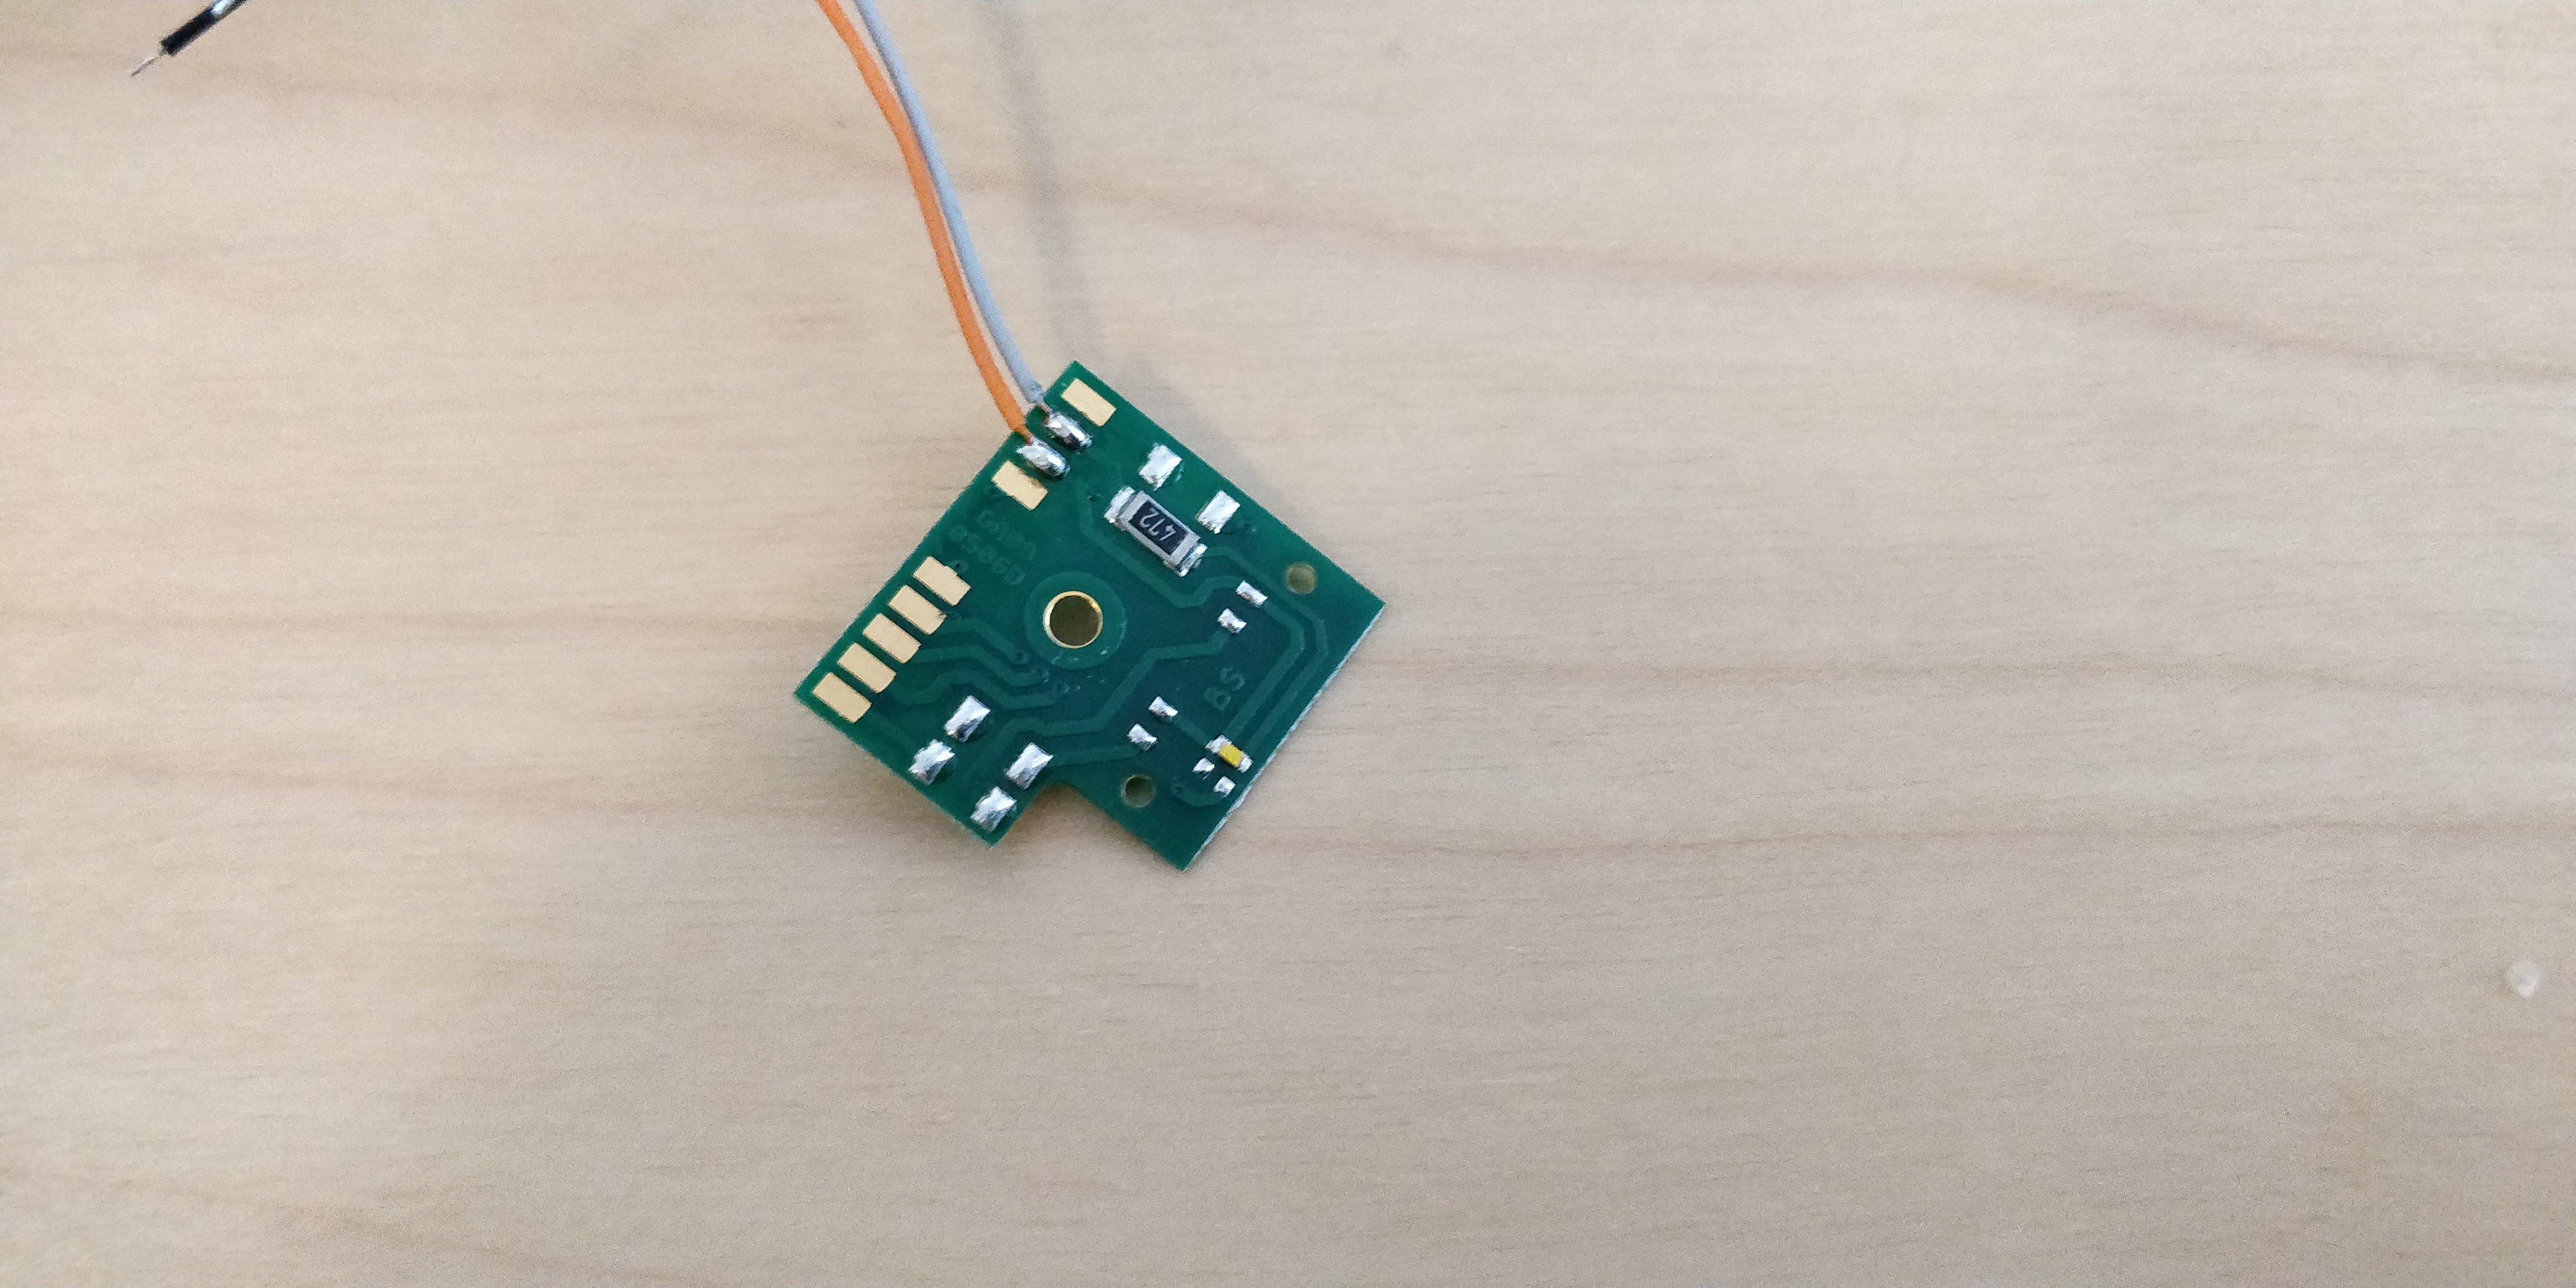
 The new PCB.
The original PCB do have the solder pads for the SMD LEDs. If you are confident with soldering SMD, you can save the spare part and just add them. By comparing my pictures it should be obvious how they go on.
I am no SMD soldering pro, so I went for the easy "order the spare part" solution for my project.
 The old PCB.
The new motherboard from the decoder kit comes with all wires attached. This can save you time as the original wires are not long enough to reach all the correct soldering pads. You can simply use the ones from the decoder kit instead. Remove the wires from the spare part and solder on the ones from the motherboard.
To be able to turn the taillight off separately from the headlights, I use AUX 1 and 2 for that. For the destination sign I use AUX 3 and 4. This allows me to setup the light configuration in the decoder's function mapping and being able to change it there later, should I want a different configuration.
There you have it. Attach the wires to the right outputs on the motherboard and enjoy your new lights on your LINT 27.
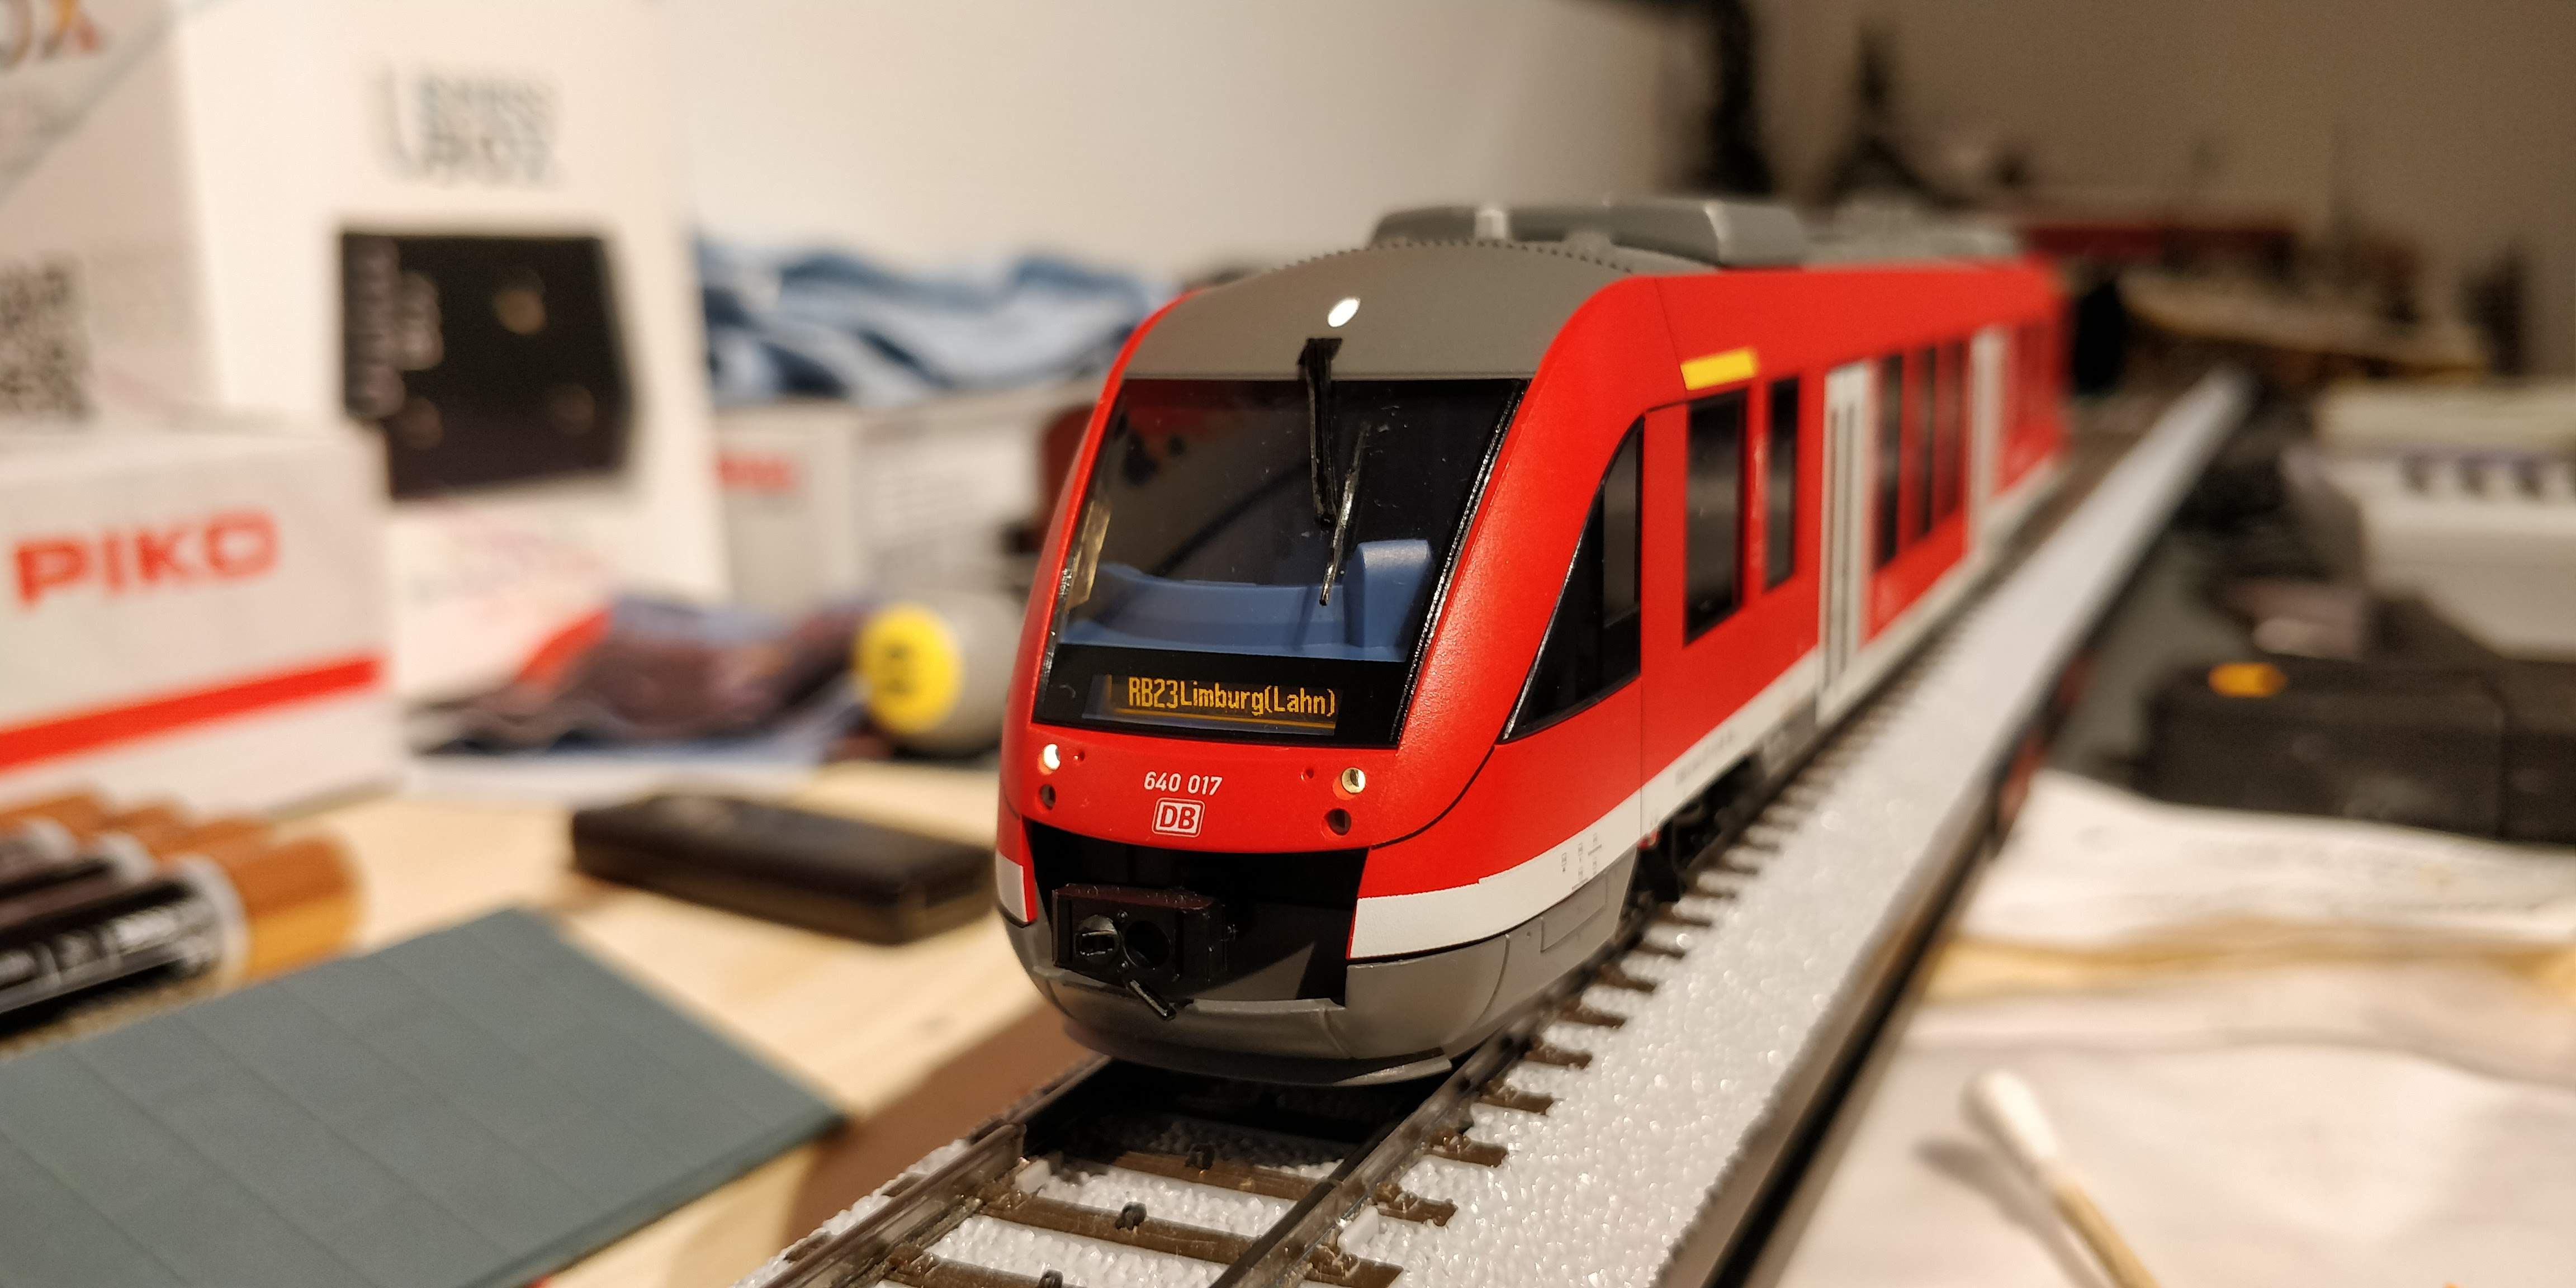
Here are the headlights and destination sign:
The newly added red taillights:

The destination sign can be turned off:

Comment
I have to say, that from the customer's point of view it is a strange choice not to include these light features in the first place. I get that the model is supposed to be a beginner's version and thus cheap, I just think that the limitations are the model's biggest problem. Especially because the prototype is a solo running railcar, it rarely runs with more than itself. The model does not even support multi-unit. You would want the red taillights to be on all the time. On the Trix model: You can't. It will be a deal breaker for many.
I understand that the cheap Märklin version is sold as part of a starter set, and those are usually good value for the money, meaning cheaper rolling stock inside the pack. That's how it is. I have no problem with that.
But here is the thing: The Trix model is not part of a starter set, it is sold as a stand alone item, just like the Märklin "pro" model. Why didn't the Trix model have the same features? It is a strange choice.
If you are not into doing all these upgrades yourself there is also a Liliput version which has these features built-in, and interior details.
Conclusion
This is an easy upgrade, especially if you go the spare part route. If you have the Trix LINT 27, I highly recommend doing this upgrade. I am sure you will be happy with the result and it does give you the feeling of getting so much more from a basic model.
Happy modelling!