Get To Know The Trix C Track
 I like to build, rebuild, break down, set up, build again, and
again and rebuild and so it goes. In other words: I need a track system that is easy to use and
easy to set up and take down. C track from Trix gives me just that.
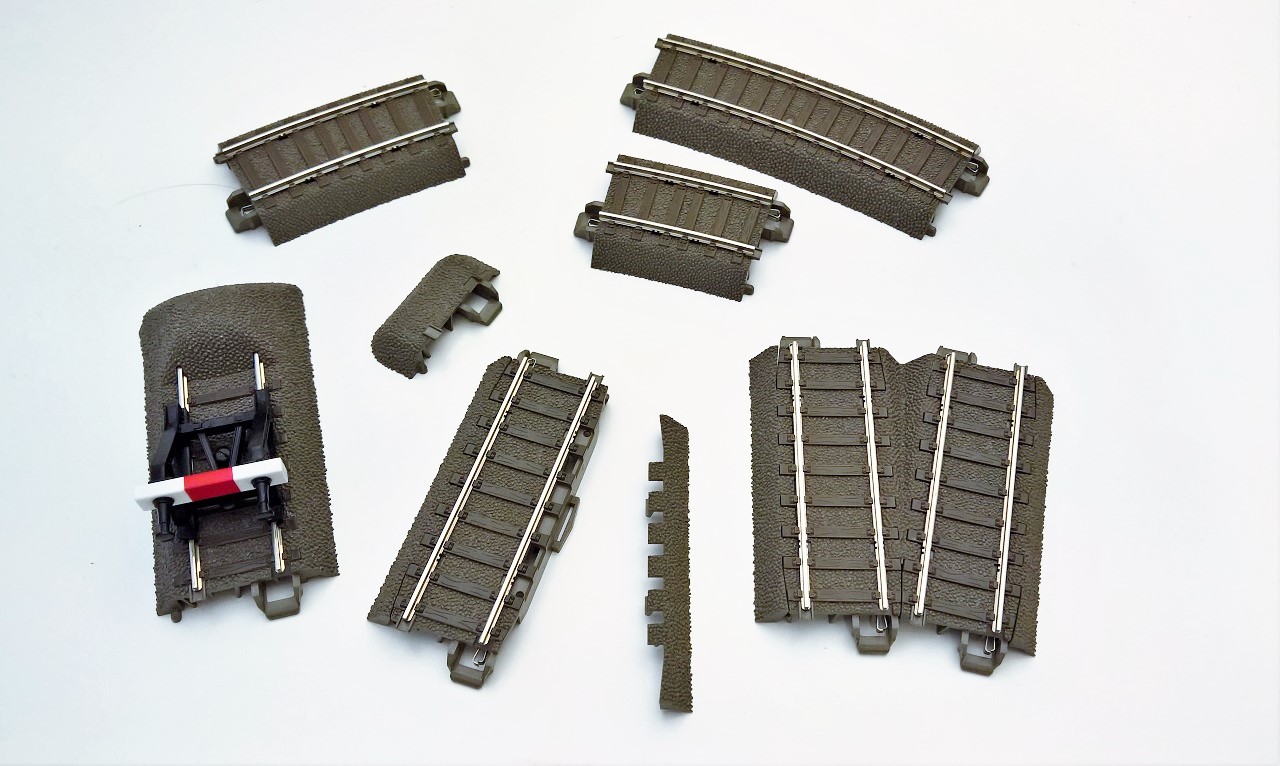
The Trix C track stands out when it comes to track systems with built-in track bed. The track system is a derivative of the well known Märklin C tack, but without the center rail. This means that the Trix C track is built for 2-rail operation and comes complete with a lot of accessories, track pieces, the turnouts have powered frogs.
The Trix C track is also designed to work with both NEM and RP25 wheel sets.

Click!
The C in C track stands for Click! Because that is the sound it makes when you put them together. Click and play so to speak.
The C track geometry is of course limited to the track pieces available. Being a derivative of the Märklin C track, which is the main track in the 3-rail world, the C track benefits from having some pretty cool track pieces that you normally do not see in similar track systems. It has long slim 12 degree turnouts, complete with powered frogs (a jumper underneath the track decides whether the frog is powered or not). It has an uncoupler track, slim curved turnouts, slim curved track etc.
With the many different track pieces I really have some options for creating a great layout, be it temporary or permanent. Take a look at some of my other C track articles for ideas on how to use the track and incorporate it into your model landscape.
Highlights
- Click! - and play! Easy to assemble and get the trains running. Because that's what we want, right?
- Code 83. The rail is 2.1 mm high (.083").
- Universal. Designed to be used with NEM wheels and RP25 wheels.
- See through between the rail and the ballast. Just like the prototype.
- Modular. The track bed always fit, you never have to cut anything.
- Protected connectors underneath the track allows for attaching accessories like signals, turnout motors etc.
- The geometry allows for all sorts of track plans. Only your imagination is the limit.
- Perfect for temporary layouts like floor layouts or dining room table layouts.
Connecting The Track Pieces
The Click! system is the most awesome thing about the C track system. This is also what makes the system extremely reliable. The connector makes sure that the power is transferred through a very reliable and stable connection. You do not find this on any other track system. Gone are the days where I had to fiddle with bend or broken track connectors. The Trix C track system just works - every time.
 Just push the track pieces
together, click! and play.

The joint is almost
invisible.
Transfer Of Power
The C track is perfect for digital operation, with the solid connection underneath the tracks I get a perfect joint for transferring the digital signal around the layout. At each connection the track piece has small soldering pads for attaching wires. If I do not want to solder, I can use spade connectors that will fit the pads. These are available as accessories.

The connection between the
tracks is solid and perfect for digital operation.
 The small soldering pads allow
for attaching wires or attaching the spade connectors that comes as an accessory.
Isolators
Some times I need to separate my layout into different sections. This may be if I'm in need of a booster or perhaps I want to have a train stop in front of a signal. With the Trix C track this is extremely easy. I just buy some of the small isolators that goes over the metal joiners. Simple as that. This allows me to isolate either one rail or both of the rails depending on what I want to achieve.

The isolators are easy to
use and extremely helpful.
As you can see from the pictures the isolators create a solid isolation between two sections of track. This is a very useful little accessory which comes in a bag of plenty.

Securely isolated connection
between two pieces of track.
Turnouts
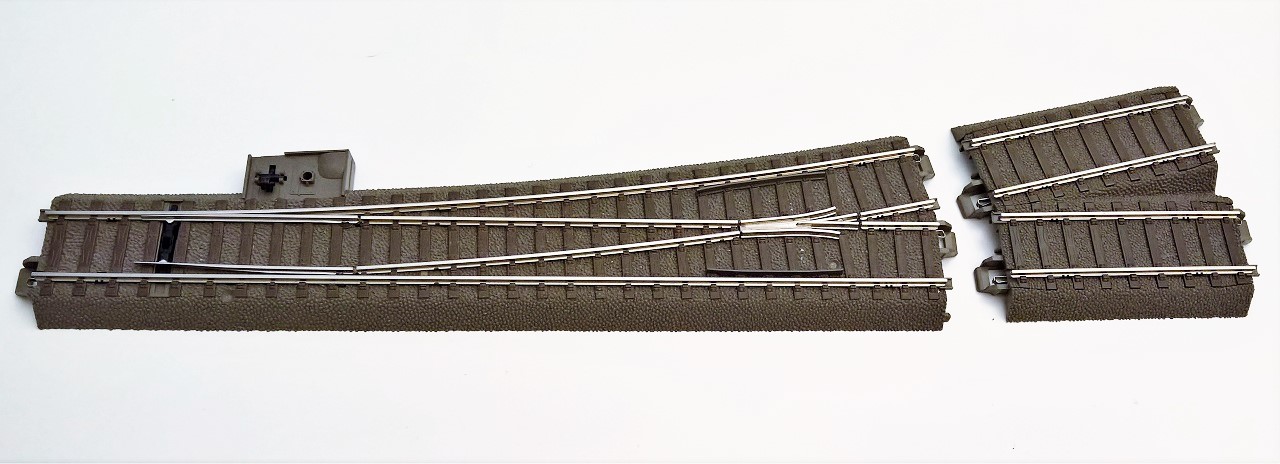
There are two types of turnouts a 24 degree and a 12 degree aka. the slim turnout. I use the slim turnouts for all my stuff. They are much easier on the eye than the sharp 24 degree. They do take up much more space so you may have to be creative with your track plan.
I decided a long time ago to make room for the slim turnouts simply because they look better. On branch lines I might still use the 24 degree, but I have not decided on that yet.
 Here is a comparison of the 12
degree turnout (left) and the 24 degree turnout.
The slim turnout needs a special track piece with a detachable track bed. The track piece doubles as an extension piece in the overall geometry. The track bed is detachable so I avoid having to cut it into shape. This is needed on systems like the older Roco Line system. It renders the track piece useless for other purposes afterwards. With the C track this will not happen.
 The slim turnout needs a special
track piece with a detachable track bed.
I think you can achieve some great looking track configurations using the slim turnout. Unfortunately a double slip switch is not available at the moment. This would be a nice addition though. Slim curved turnouts are on the way.

The turnouts in the C track
program can be motorized if you like.
You can buy special solenoid turnout motors to attach underneath the turnout, you can also buy a decoder that fits underneath the track bed. The whole thing is self containing, so you bascially get a "wireless" turnout that you can control digitally with DCC. Check out my article on the subject.
Signals
Märklin provides a wide range of signals to go with the Märklin and Trix C track. The signals are specially designed to be combined with the C track even if you are building temporary layouts. Almost all German daylight signals of type 1965 and semaphore signals are represented in the line up.
The signals come complete with DCC decoder and accessories for attaching the signals. The decoder can be attached underneath the track bed or underneath the layout. It is up to you.

Included in the box are
mounting accessories in colours matching the C track from Trix.
The signals are very, very fine in detail and finish. There are absolutely no cables visible and the signals are easily programmed using DCC or Märklin's mfx system.

A wide range of different
signals are available. Here a main signal with a distant signal attached.
As mentioned the signal decoder can be mounted underneath the layout, but I can also mount it underneath the track bed. This is convenient if I am building temporary layouts. I can fit a piece of track with a signal and decoder. The decoder can be configured to automatically start and stop trains in front of the signal (using the isolators). The decoder can also control a Märklin DC braking module.

The decoder can be fitted
underneath the track bed...
 ...like this. The purple and
white cables goes to the signal. The red and brown cables goes to the digital feeder bus.
Room for improvements
Should anyone from Märklin/Trix read this. Here are my personal wish list for additional track pieces.
- A slim double slip switch (schlanke DKW).
- A 2.9 degree R9. Allows for the current 12.1 degree R9 to become 15 degrees and thus allowing me to create a 90 degree R9 curve.
- A 15 degree R10 to complement the R9.
Why not a flex track? Flex tracks do not solve everything. I do not believe a track like the Trix C track will benefit from a flex track. First of all, there are better options for this kind of track. Second the Trix C track is what is called a "set track". It is meant to be easy to work with and a flex track will introduce unnecessary complexity. Using a flex track on the floor or the dining room table is not ideal. I think having more options for larger radius curved track is a better solution and the additional options will suit most people's needs and wishes.
Thoughts
Some people consider the C track a toy track because of the built-in track bed. They would say that you can't build anything beautiful with it. I have seen my share of poorly laid flex track with rubbish clumsy ballasting and trains derailing because of this. Still these layout owners claim to be more "professional" than you. This kind of annoys me, because that is not how I see the world.
Do not get me wrong, I am not saying that the flex track cannot look awesome. Because it can; it can look dead realistic. I am just saying that people should not judge other people's choice of track based on their prejudices on how things are. There can be thousands of reasons for one's choice and it does not make you a "lesser modeller" because you use a track with a built-in track bed.
Every track system serves a purpose. A lot of people do not have room for a permanent layout and the Trix C track is perfect for this. You build, you run, you put it away when you are done. The Trix C track can also look great on a permanent layout. In my book that is practical, and not toyish. Yes, a child can also benefit greatly from using the C track - even more practical; you can share your hobby with your child.
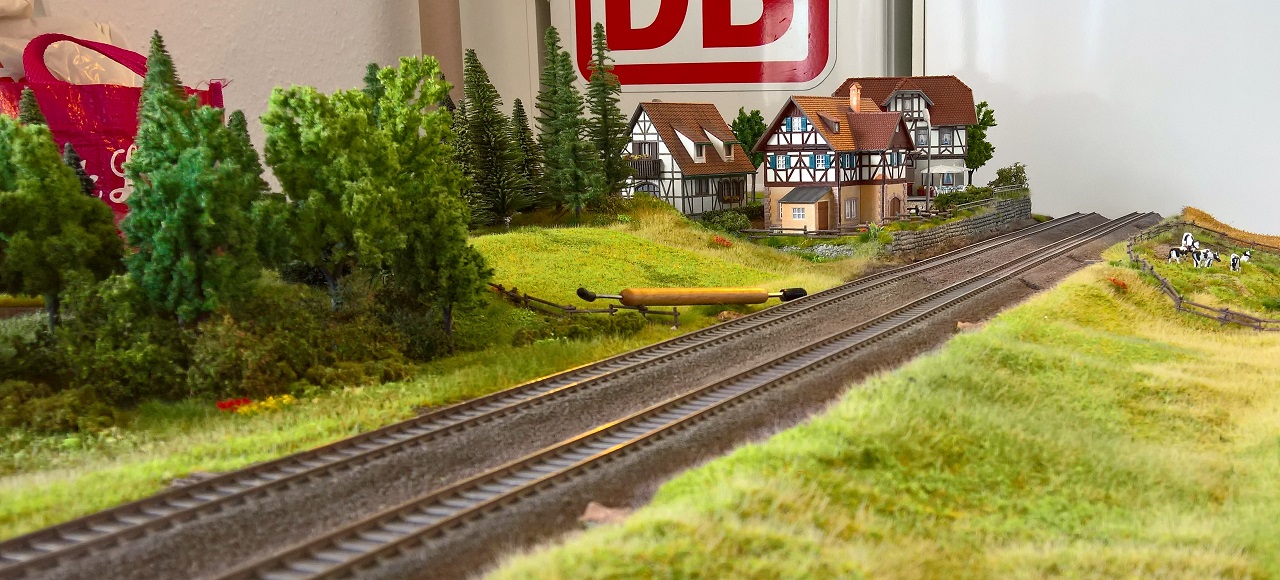
Judge for yourself. Here is a picture of some of my modules built using Trix C track. I am very proud of them and I think they look awesome.

If you are looking for a great track system and you want and easy to use, awesome looking and simple system. Give the Trix C track a try, I think you will be pleased with this easy to use track system.
Happy Modelling!